Hi
Today we will know how to register a free domain and host it for free using blogger.
Generally, we need to pay for registering a domain and also pay for hosting it on the web and that too for a limited time, say for a month, and then again we need to pay for the hosting. So much hustle bustle, right? Well, there is a method to do it for free. Let's see.
Why use a custom domain when I can use blogspot.in or blogspot.com domain?
Using a custom domain has some benefits. Like-
- First of all, a blogspot.in domain name doesn't look professional at all.
- A custom domain is easy for people to search for your website. Nobody would like to type "example.blogspot.in" and waste time, frankly speaking.
- For a better Google ranking and for a good SEO, it is necessary to have a custom domain.
- For Google Adsense approval and also for using other monetization ways it is very helpful if you have a custom domain name.
Do I need to pay for a custom domain?
Well, if you want to go for a .com or .in domain, then you need to pay for registering them because they are top-level domains. If you are not interested to spend money on domain registration and all then continue through this article, or else you can go down and look at How to host a custom domain for free using Blogger.
How can I get a custom domain for free?
This is the section you all are waiting for, admit it ;). Yes, you can get a custom domain for free for a year. For this- go to Dot.tk. Then follow the steps-
1. Login to your Freenom Account or SignUp.
2. Type the name of your blog for which you want to get a custom domain.
3. Then click on Check Availability.
--You will get a page with all the available free and paid domains for your blog according to the name you provided. Click on Get it Now!
--After clicking on Get it now!, click on the Checkout option on the top left.
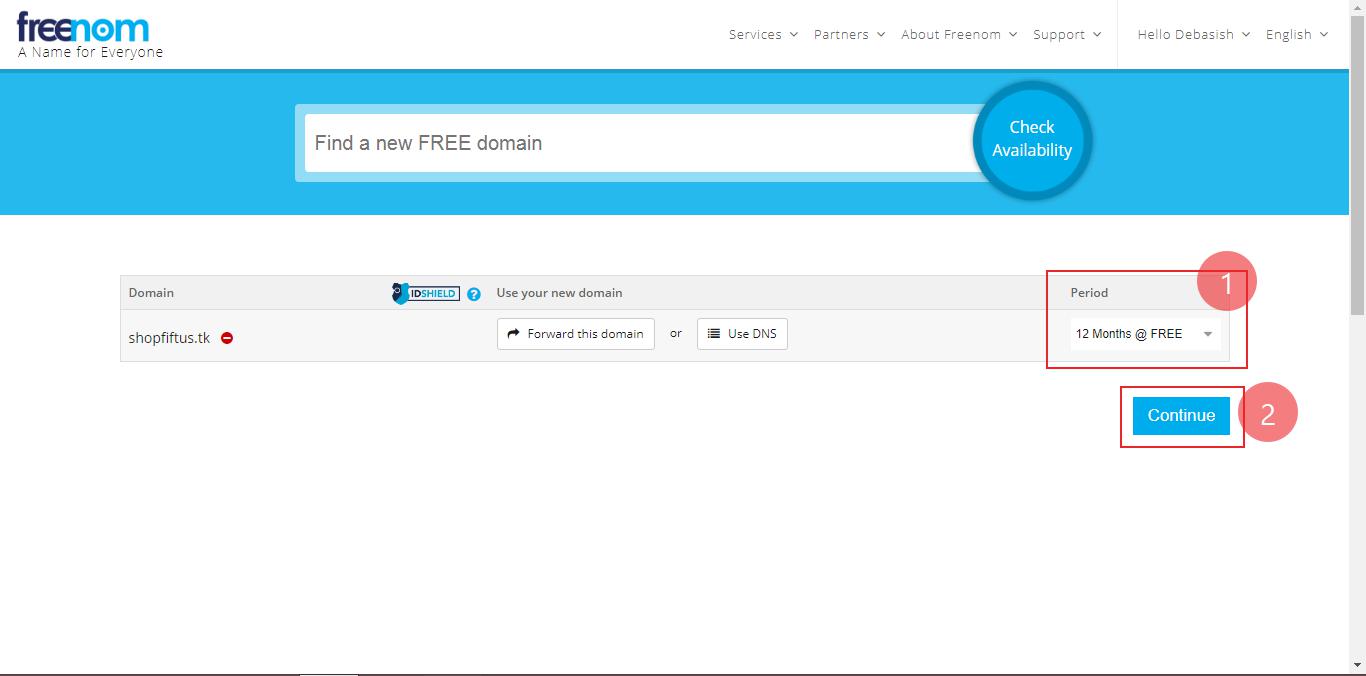
--Then, on the next page click on the box below the Period option and select the 12 Months @ FREE option.
--Then, click on Continue.
--On the next page, scroll down a little and fill the form with your details. Then, click on Terms and Conditions Agreement. Then, Complete Order.
--On the next page, click on Click here to go to your client area.
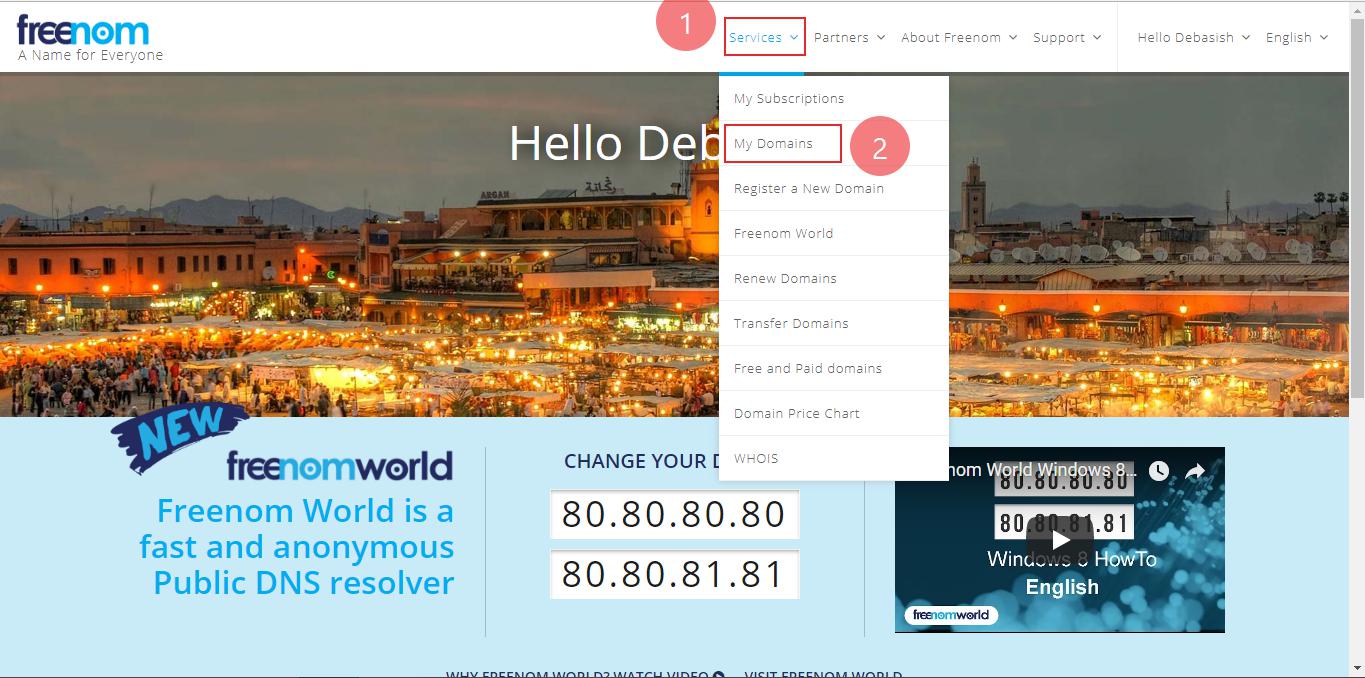
--On this page, got to Services and then click on My Domains.
--On this page, you will see the status of your domain. It is registered and active. You can see the Registration date and the Expiry date of your domain. The status should be Active, which means that your site is registered.
Now your site is registered for free. But it is not hosted on the Internet yet. A lot of you may be thinking how to host it on the internet and link this custom web address with your blogger blog.
Let's find out the answers to your questions.
How to host my web custom website address on the Internet for free and link it to blogger blog?
Some of you know and some of you don't that blogger offers free web hosting of your custom web address. To do this, follow these steps-
1. Go to blogger.com and log in to your blog.
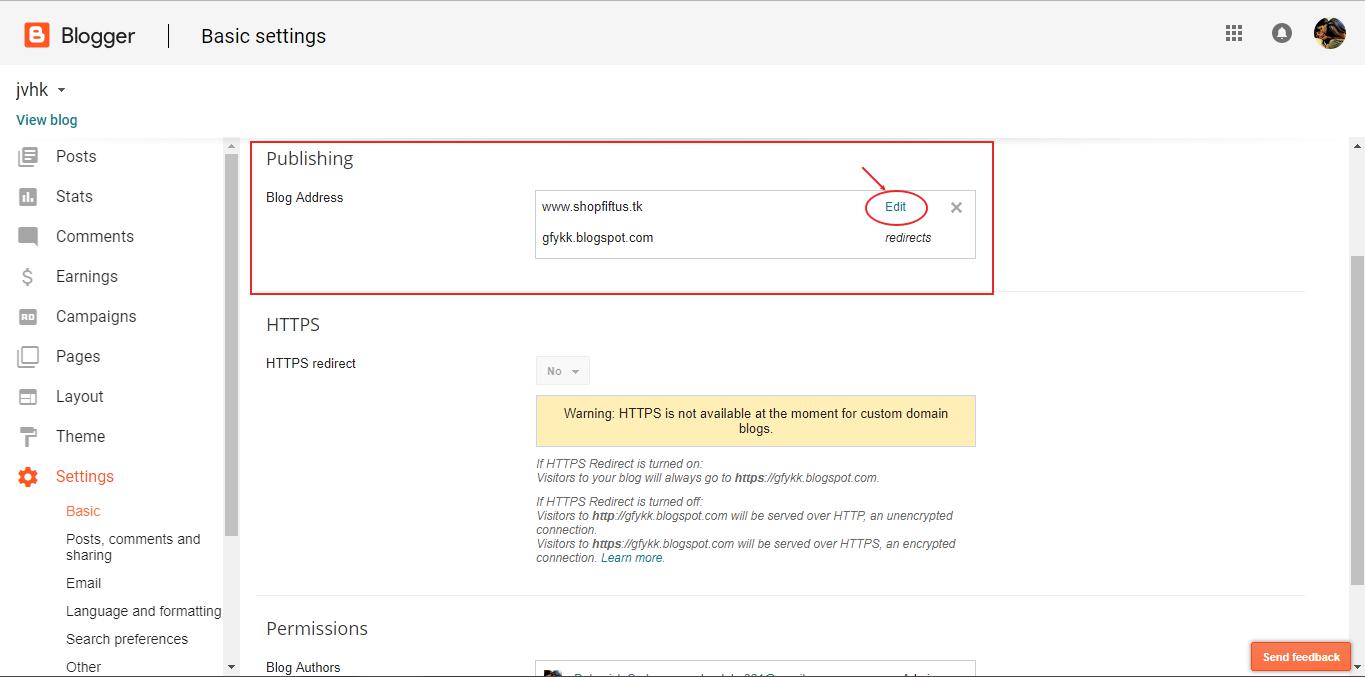
2. On the left sidebar, click on Settings>Basic.
3. Under the Publishing option locate and click +Add a third party URL to your blog.
4. Then on the box, type your registered web address as www.example.tk. Remember to add www. Otherwise, the address will not get linked. Then, click on save. You will get a page like the image below.
This is an error message, but hey, don't worry. This is normal. Just follow the next steps. Lemme tell you what the message actually means. The message reads We have not been able to verify your authority to this domain. Error 9. That means blogger is not able to verify that this domain belongs to you because they can't host your domain without verifying your authenticity to this domain or in simple words they need to verify that the domain provided by you belongs to you. And then we have Name, Label or Host field and Destination, Target or Points To field. Follow these steps to set them up accordingly.
1) Open a new tab and got to Dot.tk and login to your account.
2) Go to Services>My Domains. On this My Domain page click on Manage Domain.
3) On the next page click on Manage Freenom DNS.
4) Here on this page, you will see a blank record. Click on +More Record. This will create another blank record.
5) Now, under the Type option, you will see A. Change it to CNAME for both the record.
6) You are nearly done. Now go to the tab where blogger is open and you have the
| Name, Label or Host field | Destination, Target or Points To field. |
|---|
From here copy the first name which is www. Now go to the tab where you have the blank records and paste the www in the Name field in the first record. Now go to the blogger tab and copy the words under the Target option which will be ghs.google.com. Now go to the record page and paste it into the Target field in the first record.
Now go to the blogger tab and copy the second Name and then paste it under the Name option in the second record. Now go to the blogger tab and copy the words under the Target option and then go the record tab and paste it into the box under the Target option. Now click on Save Changes.
Follow the image below to understand clearly.
Remember, if you don't complete this steps, blogger will not be able to verify your domain and you can't host it. So do make sure to enter the correct names and targets in their correct order as described in the points above.
After Saving the Changes in the DNS MANAGEMENT, Click on BACK TO DOMAIN DETAILS. Then go to the blogger tab and wait for a few minutes, say for 5 minutes. After that click on the save option. You will see SETTINGS WERE SAVED SUCCESSFULLY which means blogger verified your domain. Now click on edit.
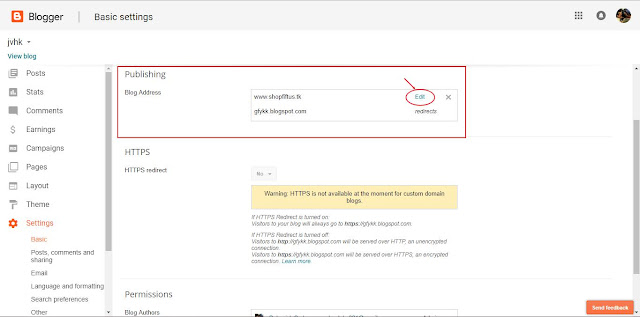
Now select the box which says Redirect shopfiftus.tk to www.shopfiftus.tk. This is done so as to redirect your blogspot.in domain to your custom domain. If you have distributed your blogspot.in domain to your friends and social media platforms after you created your blogs then everyone will go to yourblog.blogspot.in every time they want to visit your blog. But you had changed the domain to a custom domain so if you don't redirect your Blogspot.in domain to your custom domain then people who have your blogspot.in domain will not be able to find your site because you changed it to a custom domain. So, in that case, redirects helps. After you Redirected your blogspot.in to your custom domain by selecting that box, people who will type yourblog.blogspot.in will automatically be directed to your custom domain address yourblog.tk.
(follow the image for redirection)
That's all for now. Hope this article is helpful. Contact us if you face any problem following the steps above or if you are stuck somewhere between the steps. We will respond to you ASAP. You can also post your problems (if any) and suggestions in the comment section.
Please do like and share.
You can subscribe with your email. All the latest posts will directly go to your email.
We are on GOOGLE PLAYSTORE now. Click on the badge below to get our app directly from the Google Playstore.


No comments:
Post a Comment